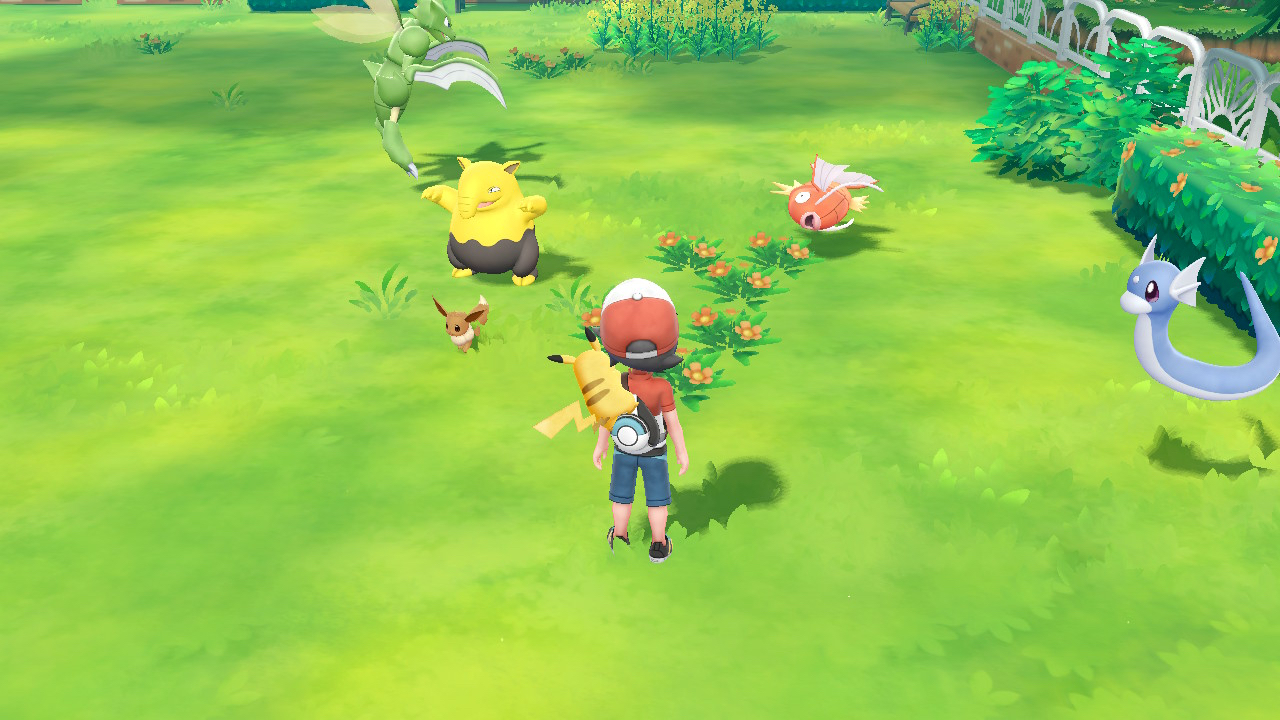
※画像は『ポケットモンスター Let’s GO! ピカチュウ・Let’s GO! イーブイ』のものです。
この記事では、『ポケモンGO(Pokémon GO)』で捕まえたポケモンを『ポケットモンスター Let’s Go! ピカチュウ・Let’s Go! イーブイ(以下、ピカ・ブイ)』に送る方法を紹介します。
『ピカ・ブイ』にポケモンを送るときの注意点
『ピカ・ブイ』をある程度進めないと送れない
『ポケモンGO』で捕まえたポケモンを『ピカ・ブイ』へ送るには、セキチクシティまで進める必要があります。
セキチクシティにある「GOパーク」でポケモンの転送が可能になります。
送れるポケモンは限られている
『ピカ・ブイ』に送れるポケモンは、「アローラのすがた」を含むカントー地方のポケモンとメルタン、メルメタルとなっています。
『ピカ・ブイ』に送ったポケモンは『ポケモンGO』へ戻せない
『ピカ・ブイ』へ送ったポケモンは、『ポケモンGO』へ戻すことはできません。
送っても良いポケモンなのかを考えてから送るようにしましょう。
送ったポケモンの情報(強さ)は『ポケモンGO』にいたときと変わる
『ピカ・ブイ』へ送ったポケモンの情報は、『ポケモンGO』のときと変わります。
『ポケモンGO』内で強いとされたポケモンを送っても、引き継がれるわけではないので注意しましょう。
『ピカ・ブイ』にポケモンを送るための準備
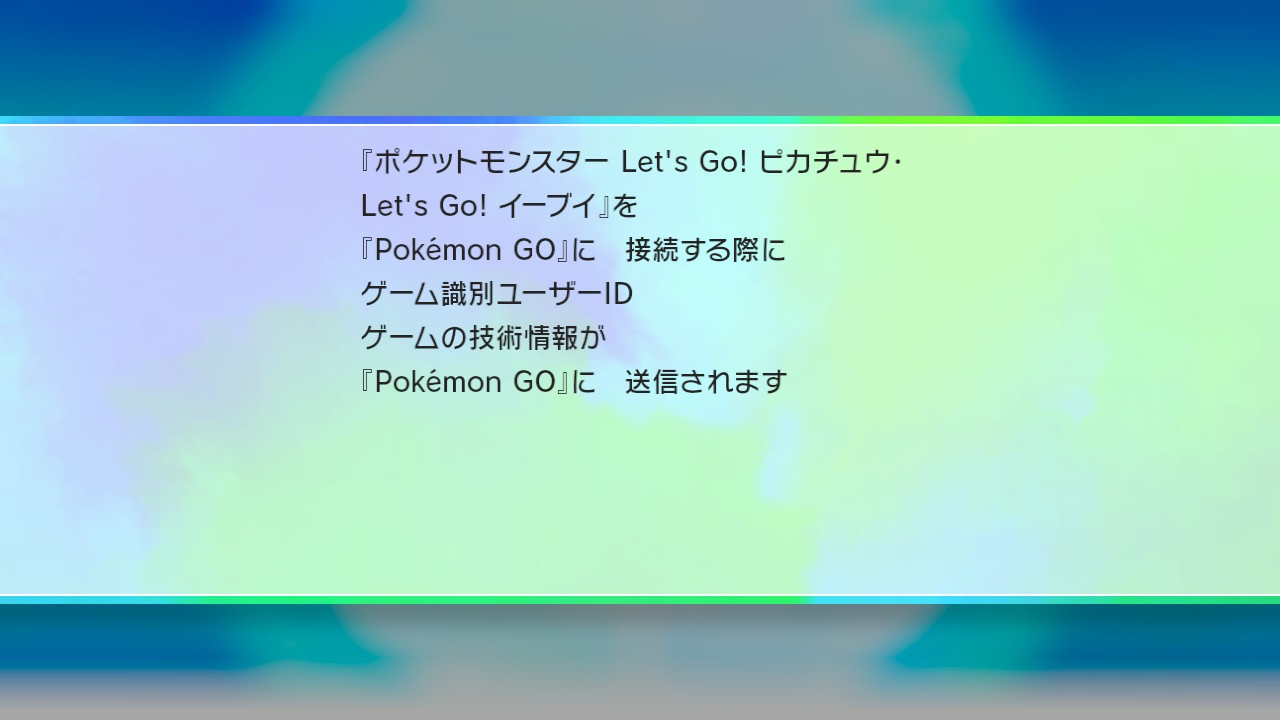
『ピカ・ブイ』へポケモンを送るには、『ポケモンGO』と『ピカ・ブイ』をペアリングしておく必要があります。
ペアリング:『ポケモンGO』側の手順
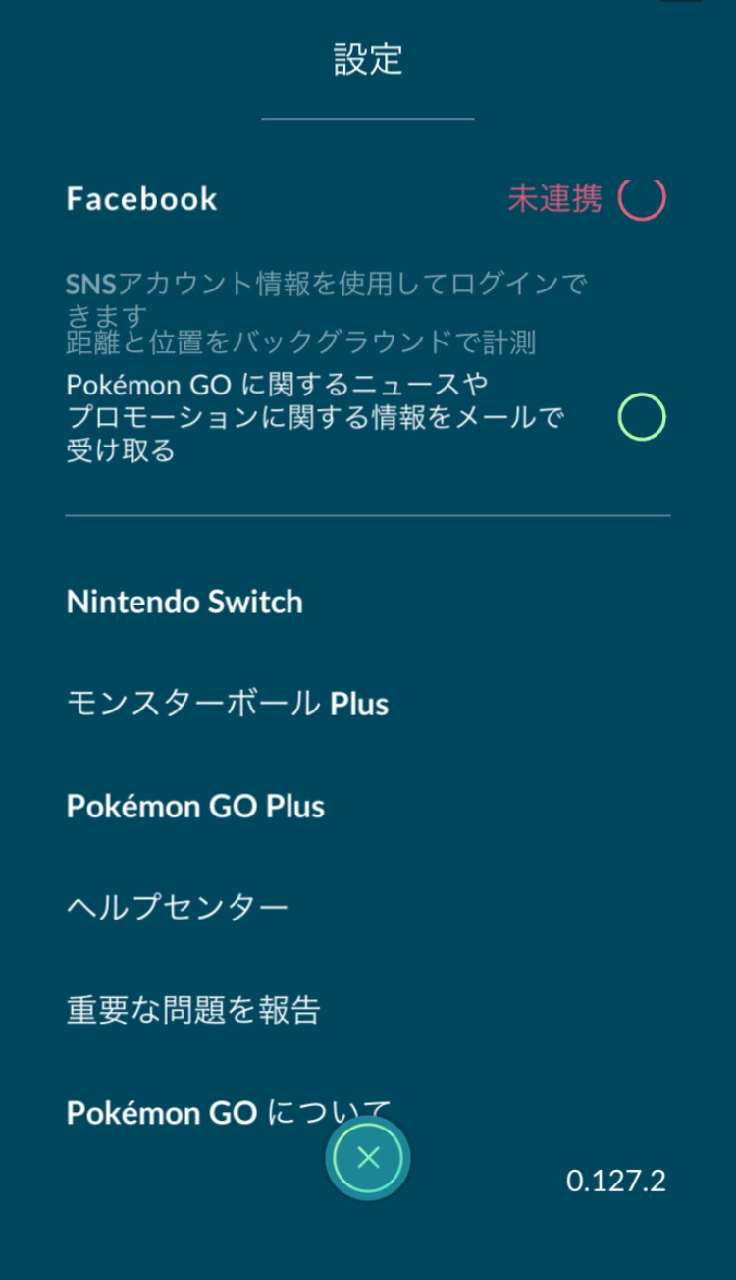
モンスターボールのアイコンをタップし、「設定」を開く。
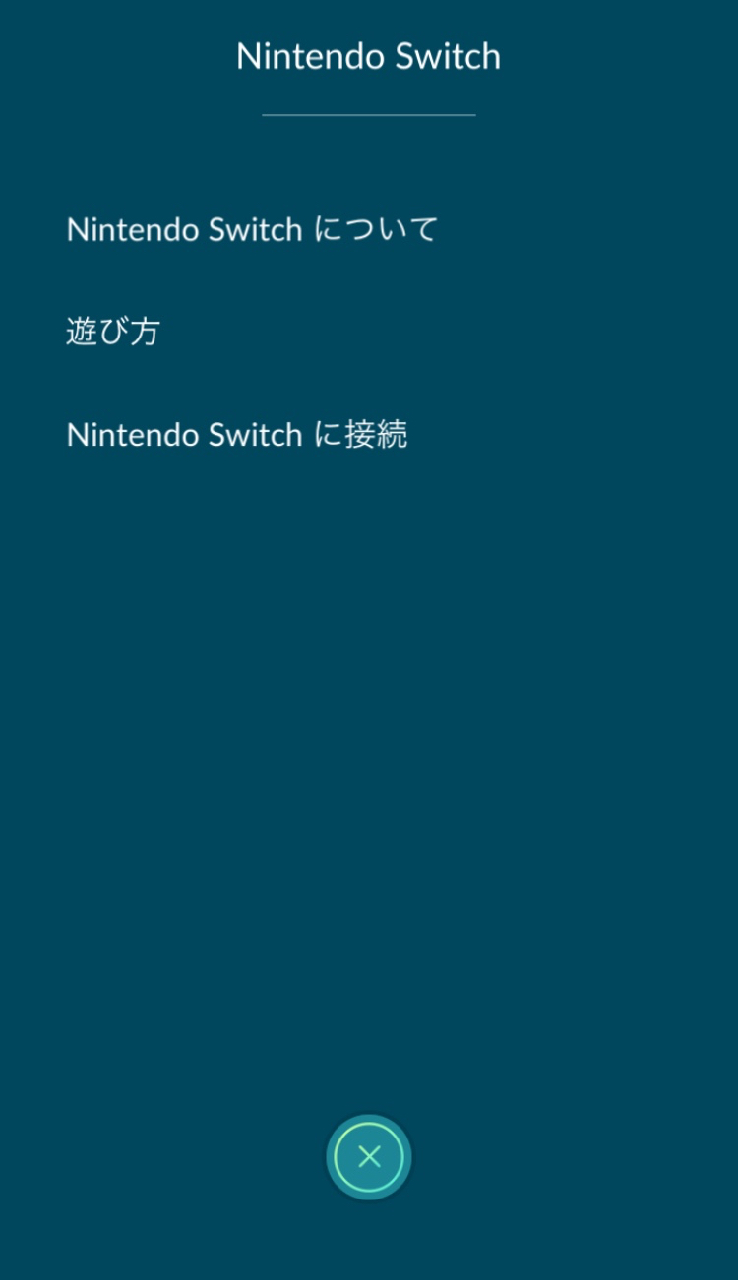
「設定」にある「Nintendo Switch」をタップ。
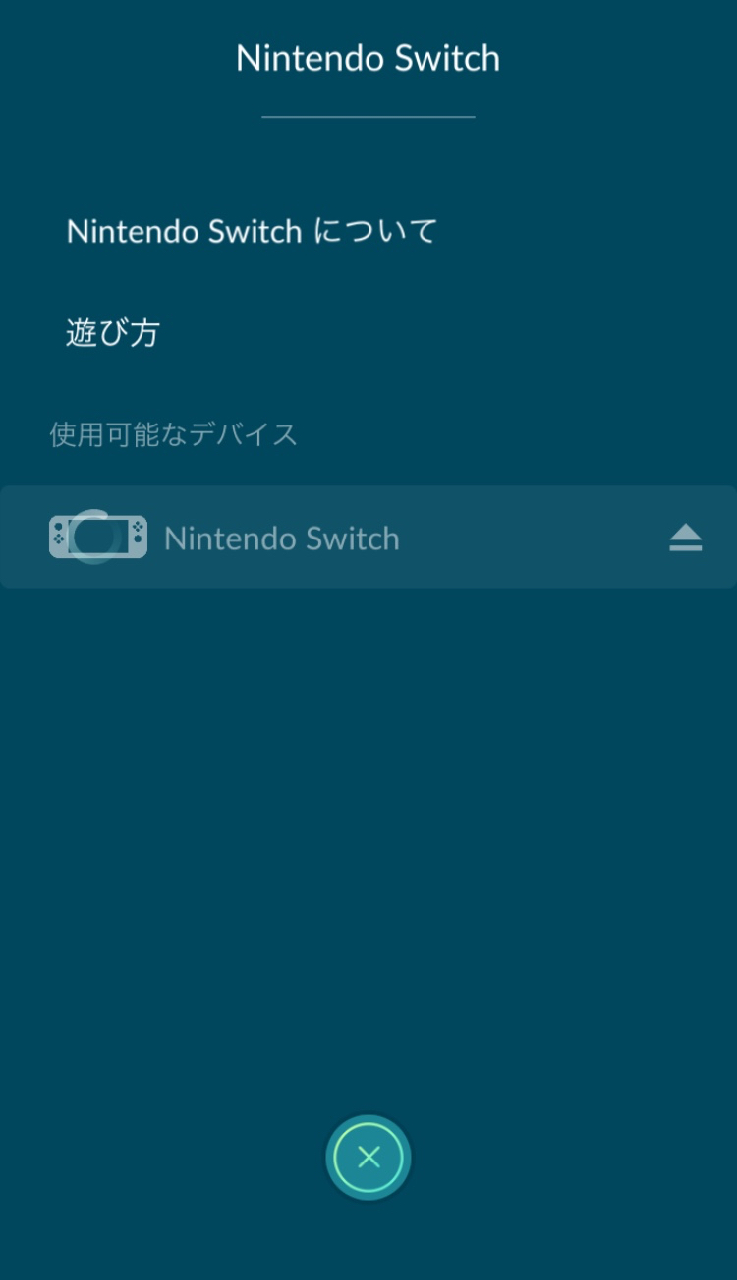
「Nintendo Switchに接続」をタップ。
すると、Nintendo Switchを探し始めるので、『ピカ・ブイ』側のペアリング手順を進めましょう。
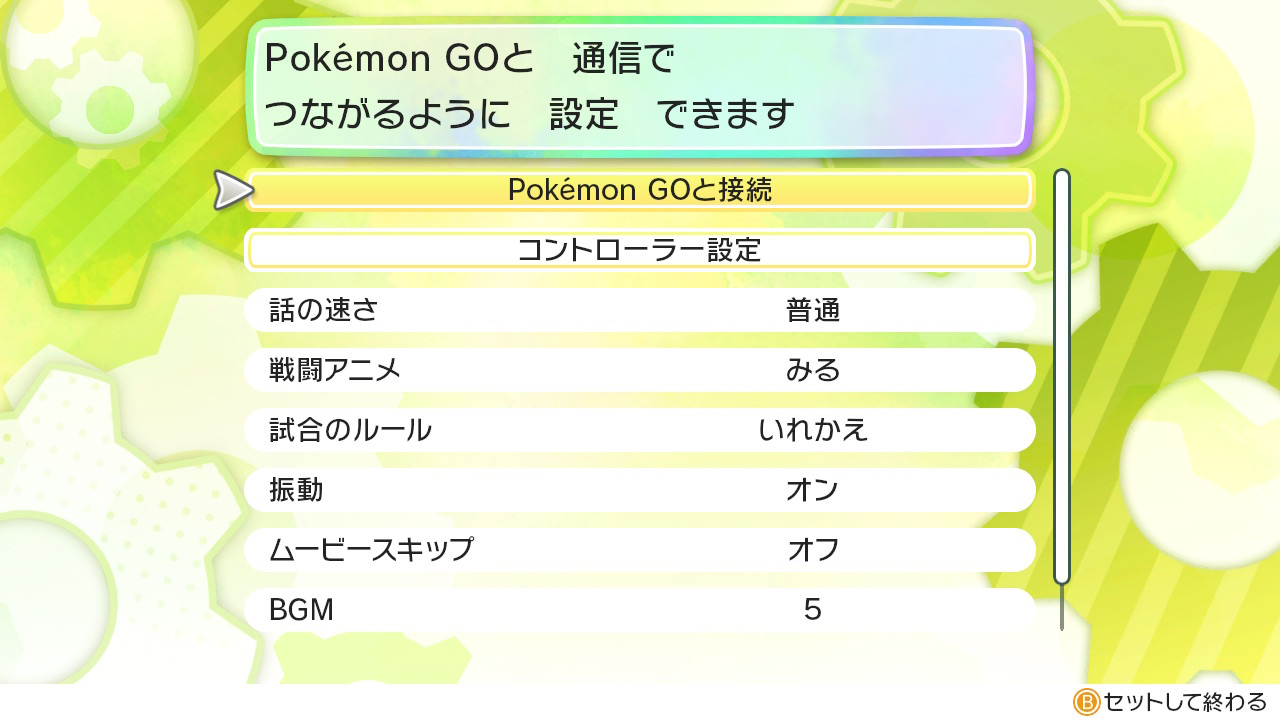
ペアリング:『ピカ・ブイ』側の手順
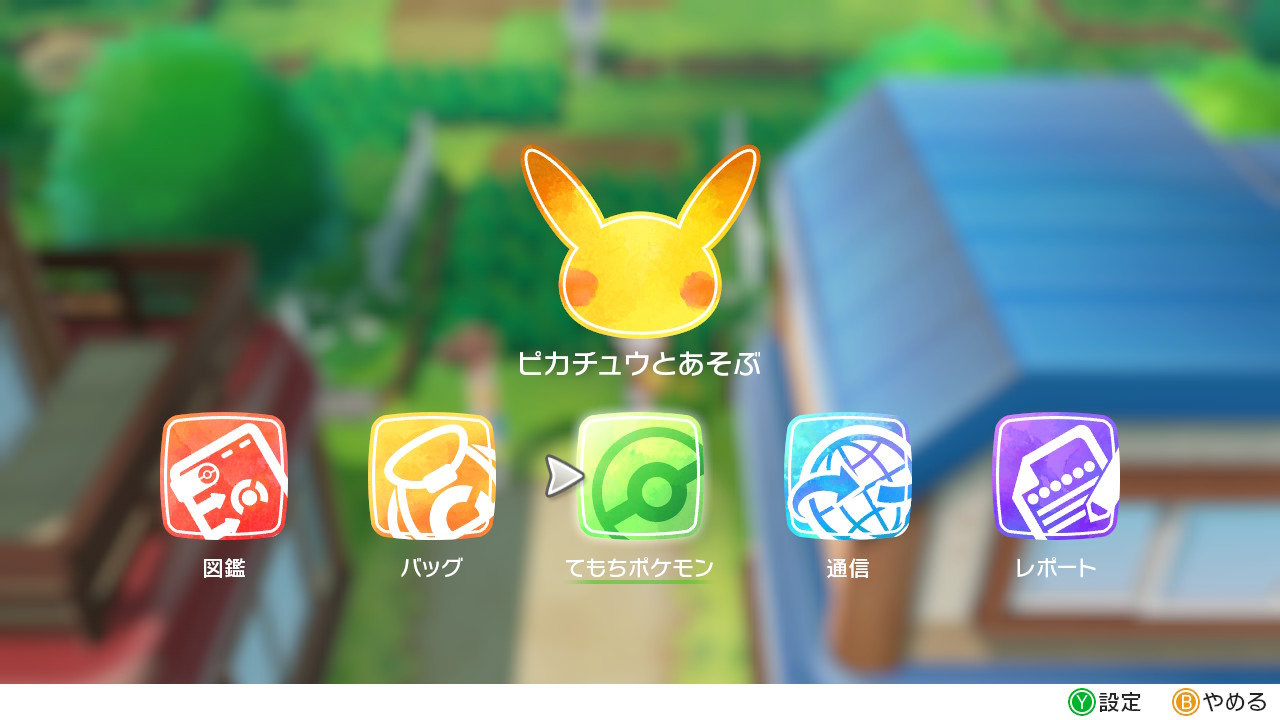
Xボタンを押してメニューを開き、「Y設定」を選ぶ。
※画像は『ポケットモンスター Let’s GO! ピカチュウ・Let’s GO! イーブイ』のものです。
「Pokémon GOと接続」を選ぶ。
※画像は『ポケットモンスター Let’s GO! ピカチュウ・Let’s GO! イーブイ』のものです。
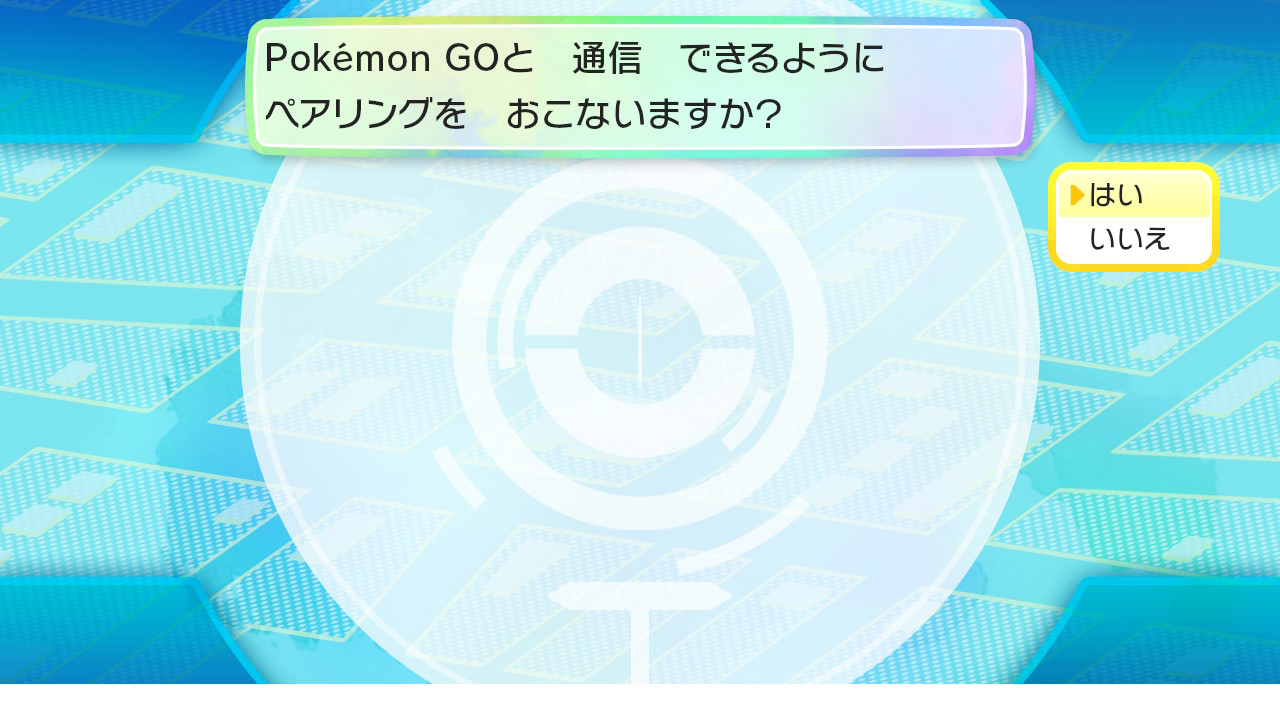
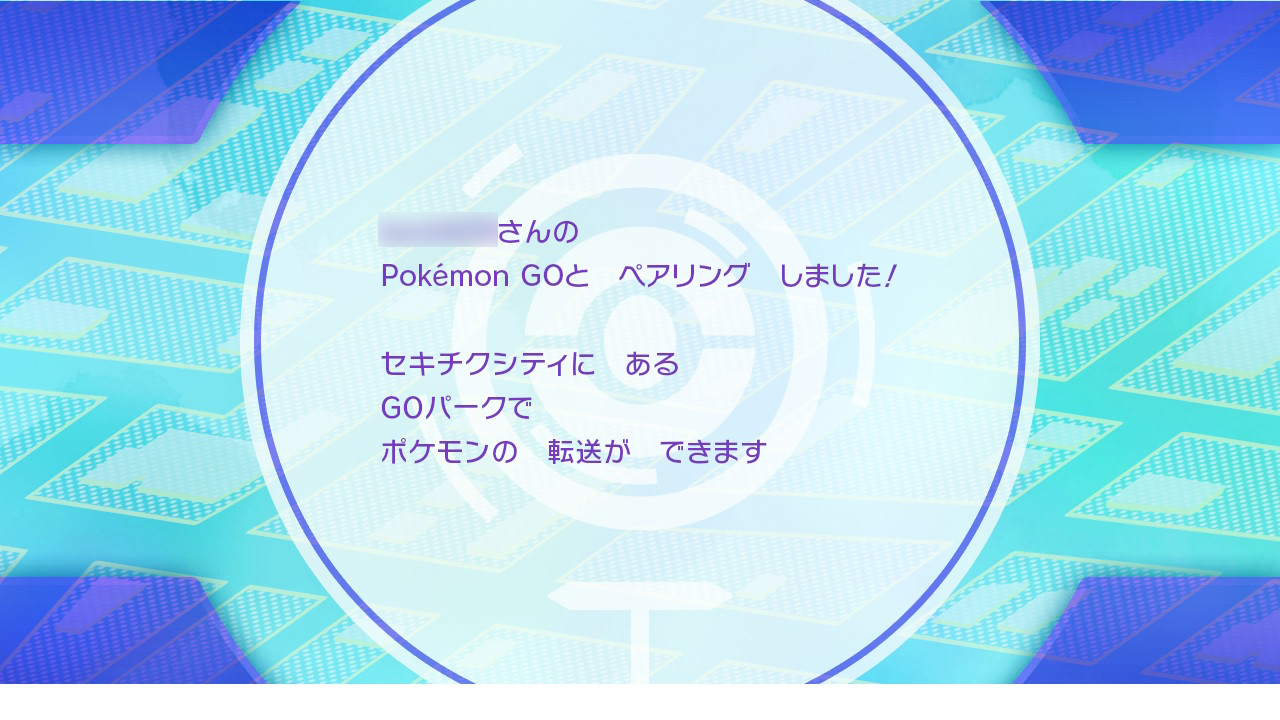
「ペアリングをおこないますか?」で、「はい」を選ぶ。

※画像は『ポケットモンスター Let’s GO! ピカチュウ・Let’s GO! イーブイ』のものです。
※画像は『ポケットモンスター Let’s GO! ピカチュウ・Let’s GO! イーブイ』のものです。
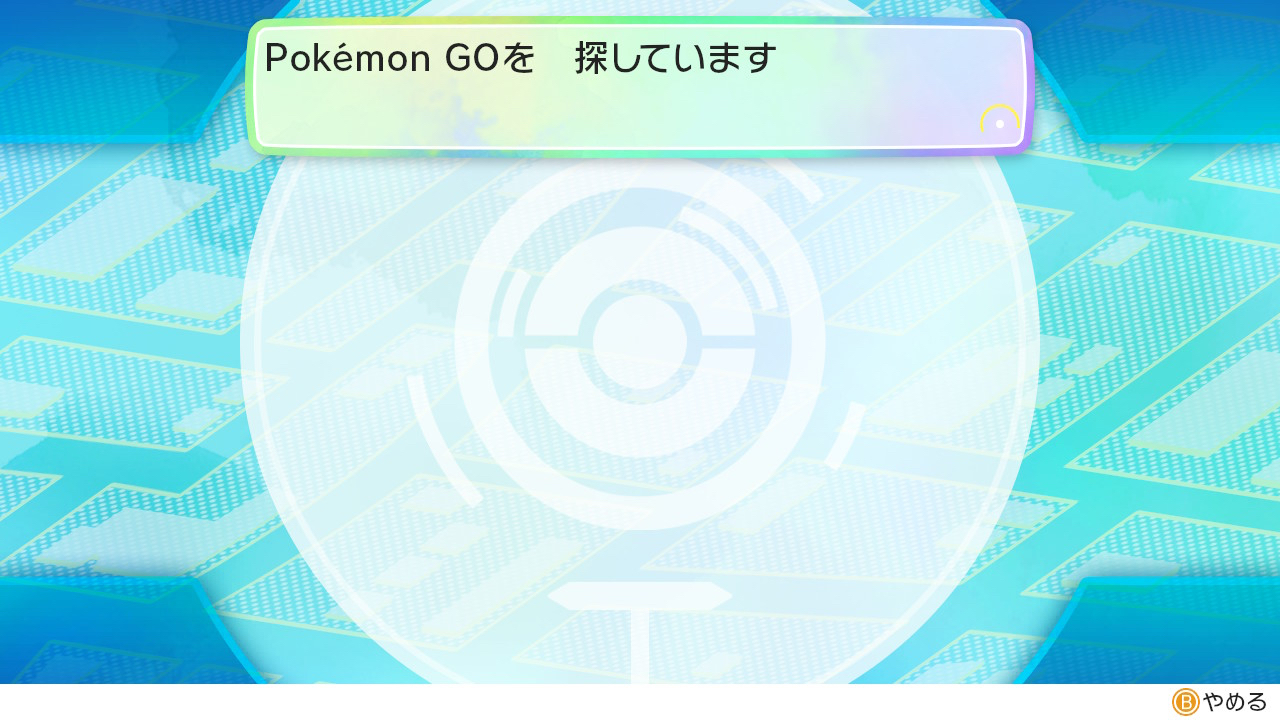
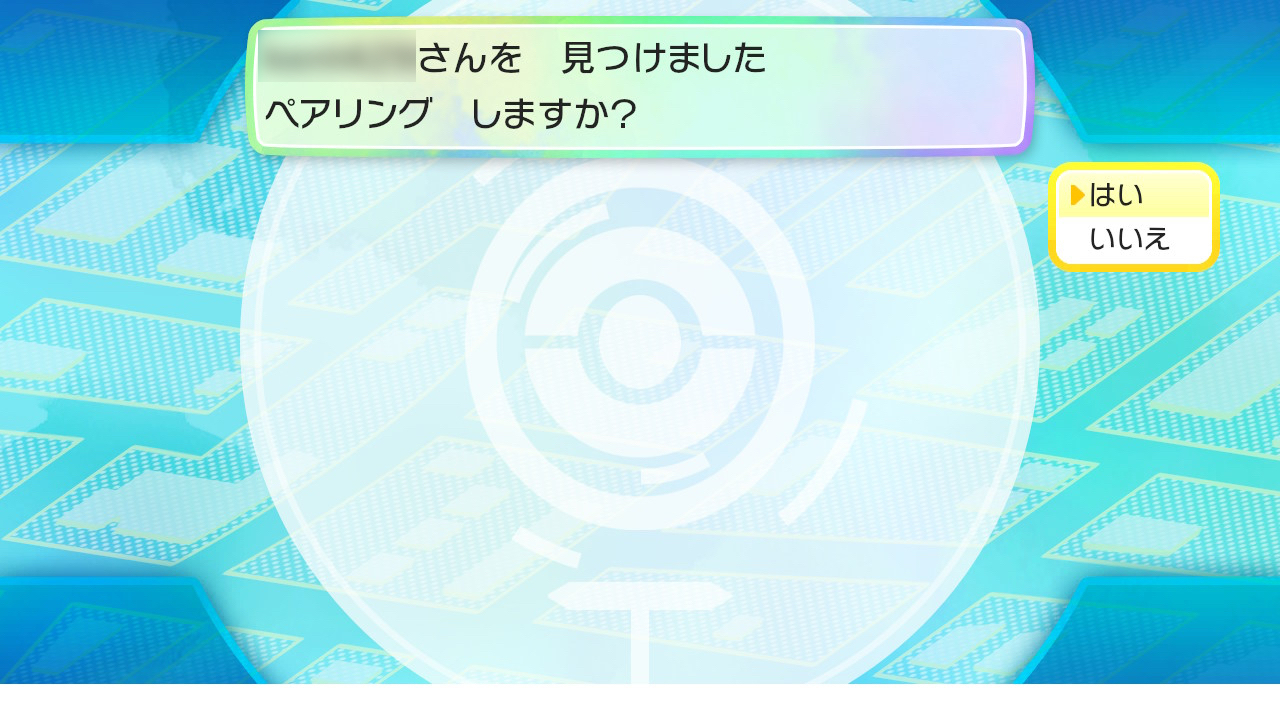
ここで、『ポケモンGO』側で「Nintendo Switchに接続」をタップしておくと、ペアリングするアカウントを見つけられます。
問題なければ「はい」を押すとペアリング成功。
※画像は『ポケットモンスター Let’s GO! ピカチュウ・Let’s GO! イーブイ』のものです。
※画像は『ポケットモンスター Let’s GO! ピカチュウ・Let’s GO! イーブイ』のものです。
※画像は『ポケットモンスター Let’s GO! ピカチュウ・Let’s GO! イーブイ』のものです。
『ピカ・ブイ』にポケモンを送る方法
『ポケモンGO』からポケモンを送る
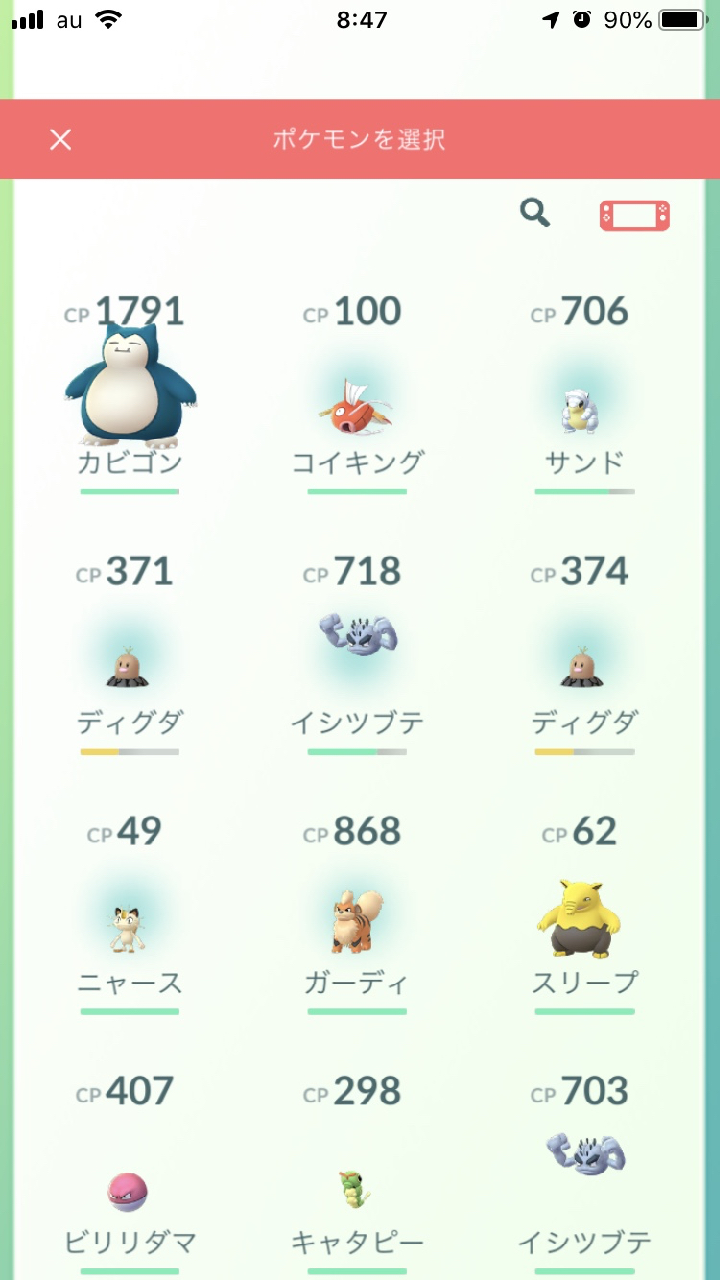
ポケモンボックスを開くと、右上に「Nintendo Switch」のアイコンが表示されるのでタップする。
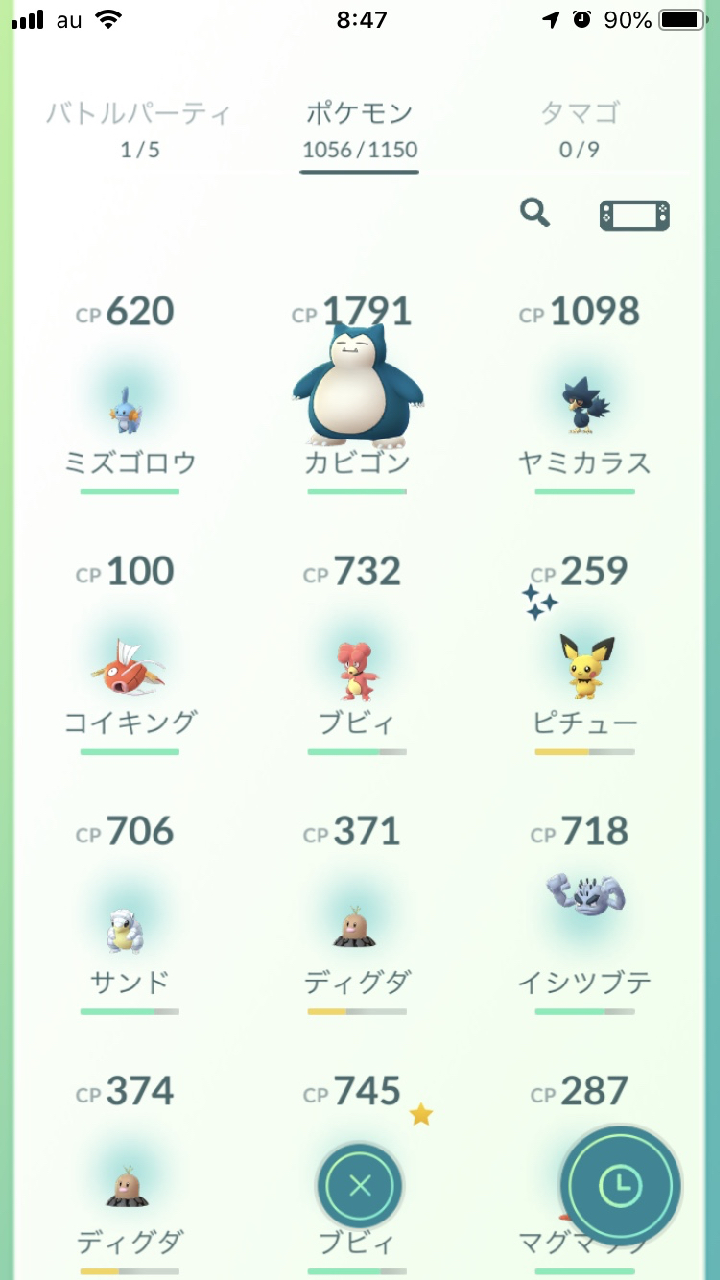
『ピカ・ブイ』へ送るポケモンをタップして選択します。
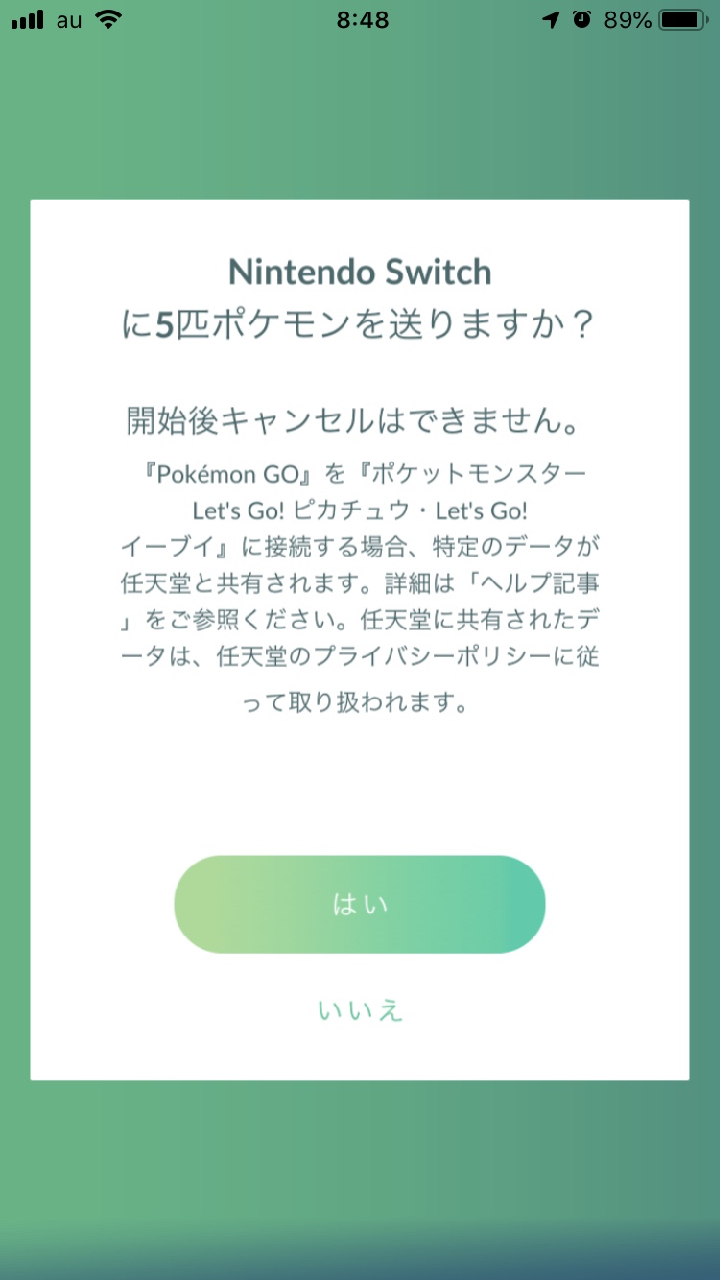
※一度に送れるポケモンは50匹です。
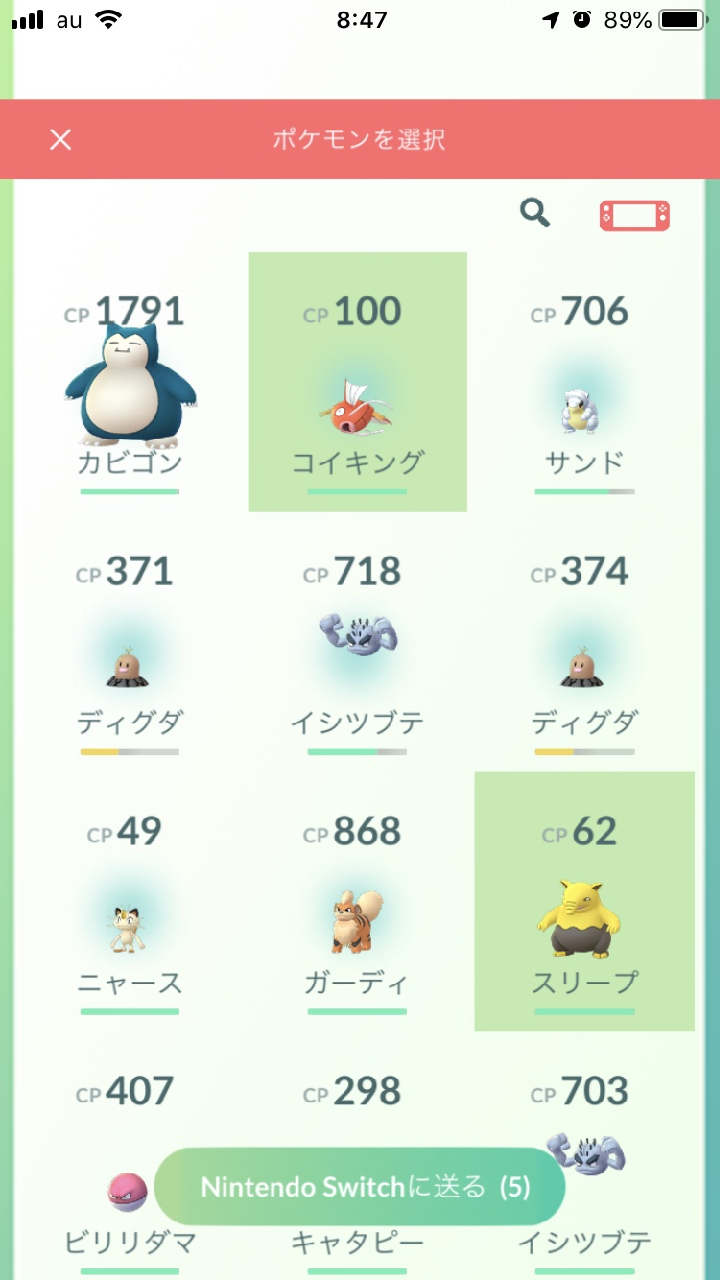
送るポケモンを決めたら、「ポケモンを送りますか?」で「はい」を選択。
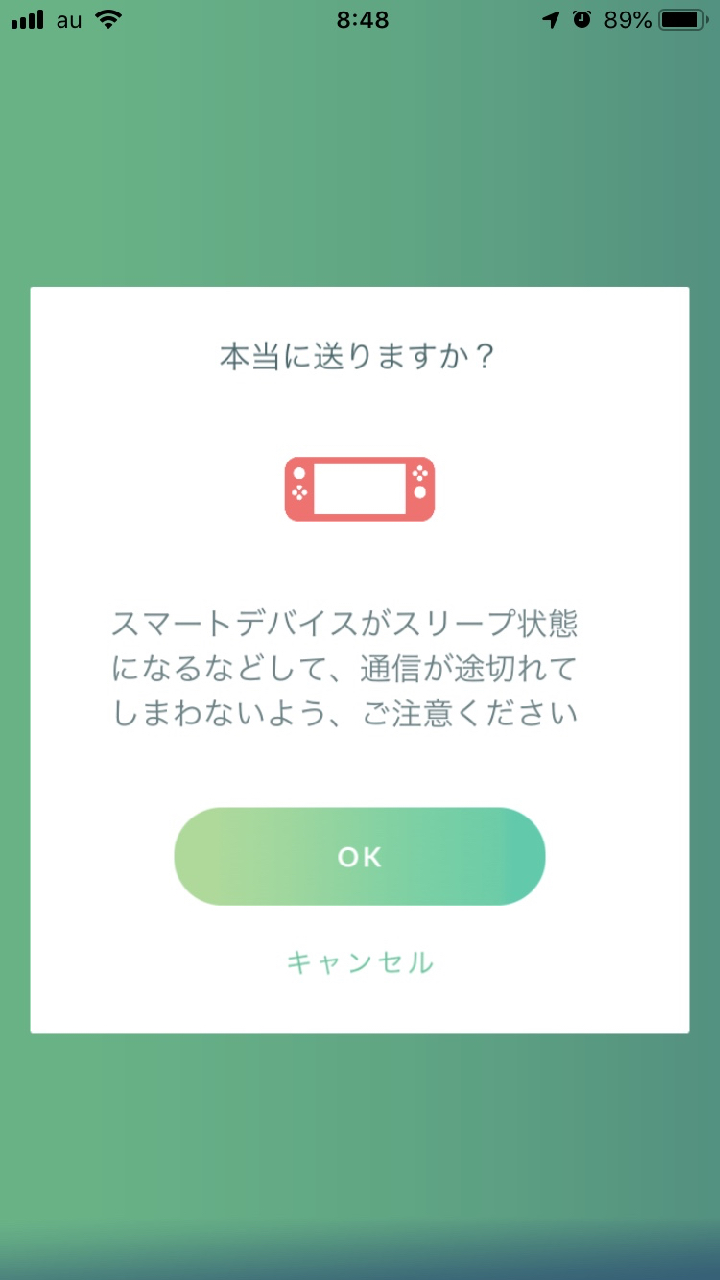
「本当に送りますか?」で、「OK」を選択すると『ピカ・ブイ』へポケモンが送られます。
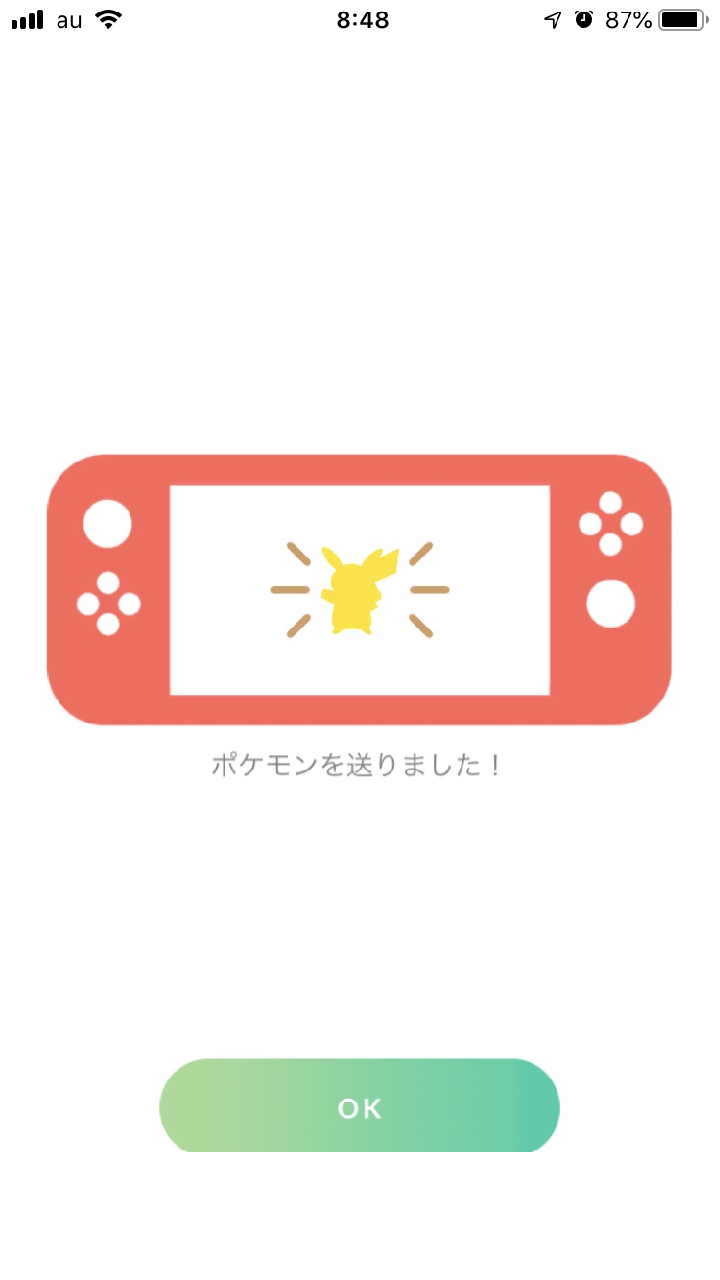
『ピカ・ブイ』側でポケモンを受け取ると、「ポケモンを送りました!」のメッセージが表示され、「送ったポケモンのアメ」や「ふしぎなはこ」がもらえます。
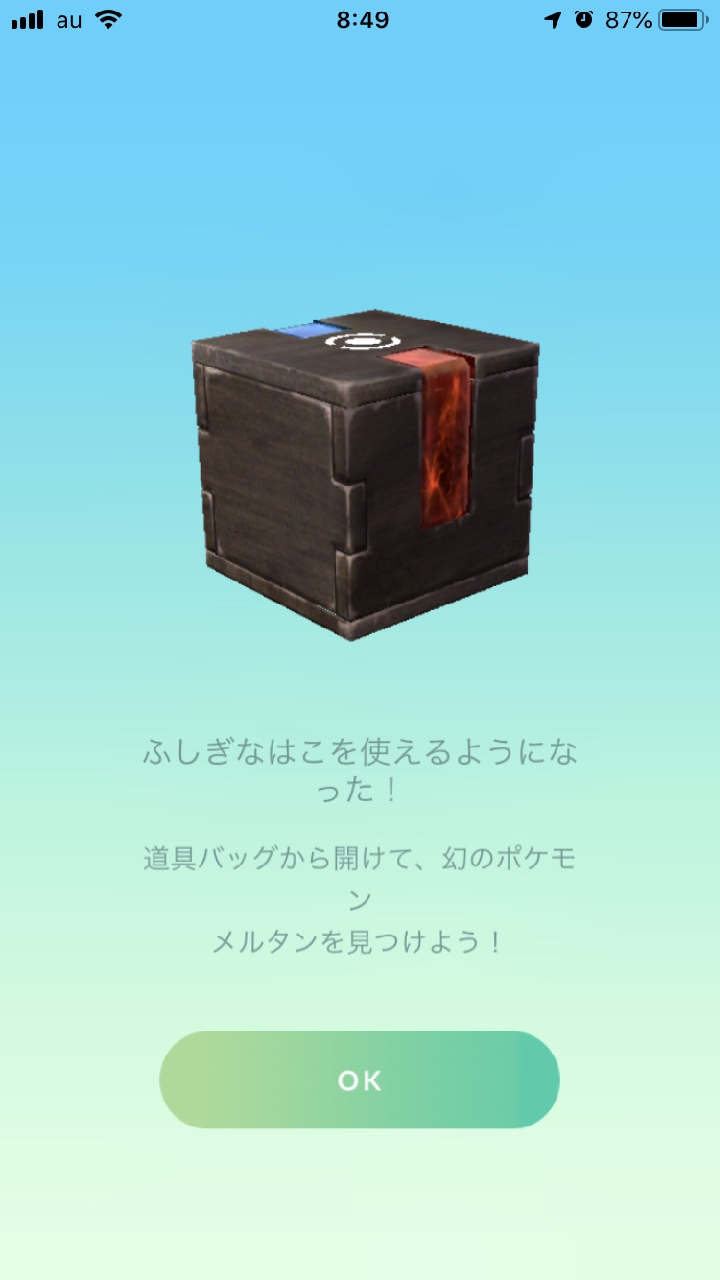
※初めてポケモンを送った際に「ふしぎなはこ」がもらえます。
※「ふしぎなはこ」は同時に2つ以上保有することができません。
※「ふしぎなはこ」は一度使用するとしばらく使用できなくなり、一定期間が経過した後に、ポケモンを『ピカ・ブイ』に送ると、また使用できるようになります。
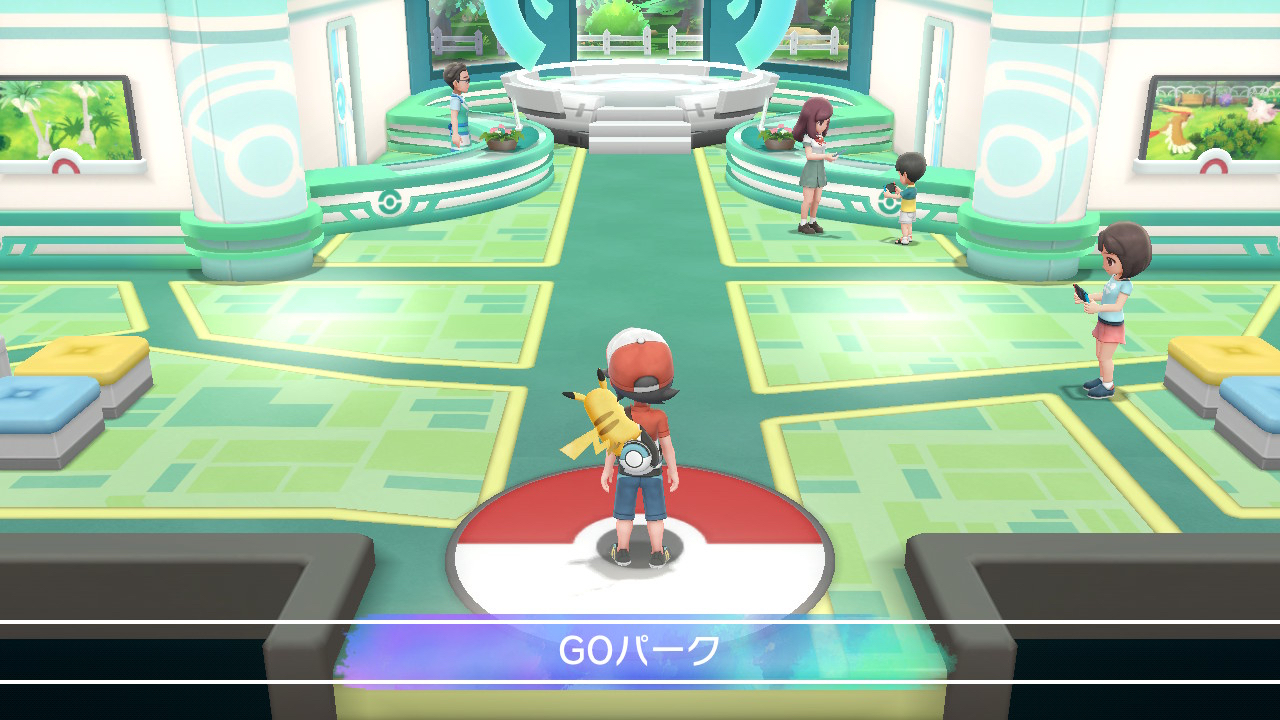
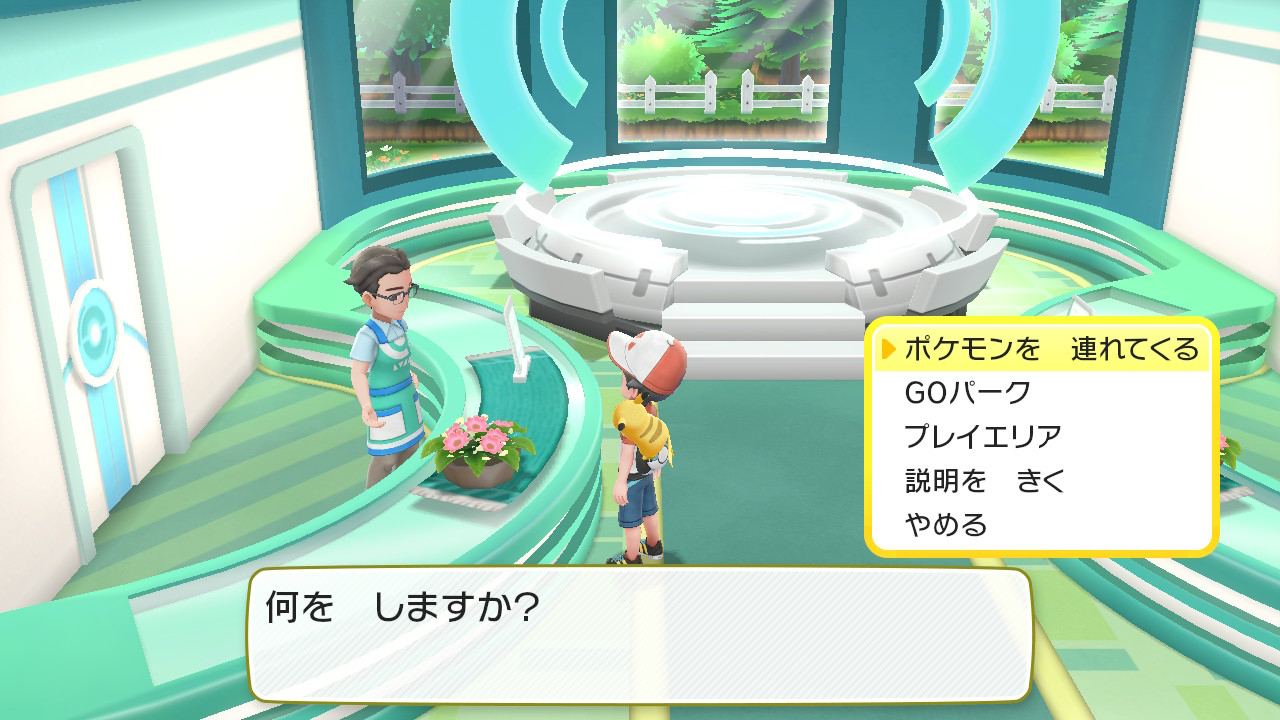
『ピカ・ブイ』でポケモンを受け取る
セキチクシティの「GOパーク」で、「ポケモンを連れてくる」を選ぶ。
※画像は『ポケットモンスター Let’s GO! ピカチュウ・Let’s GO! イーブイ』のものです。
※画像は『ポケットモンスター Let’s GO! ピカチュウ・Let’s GO! イーブイ』のものです。
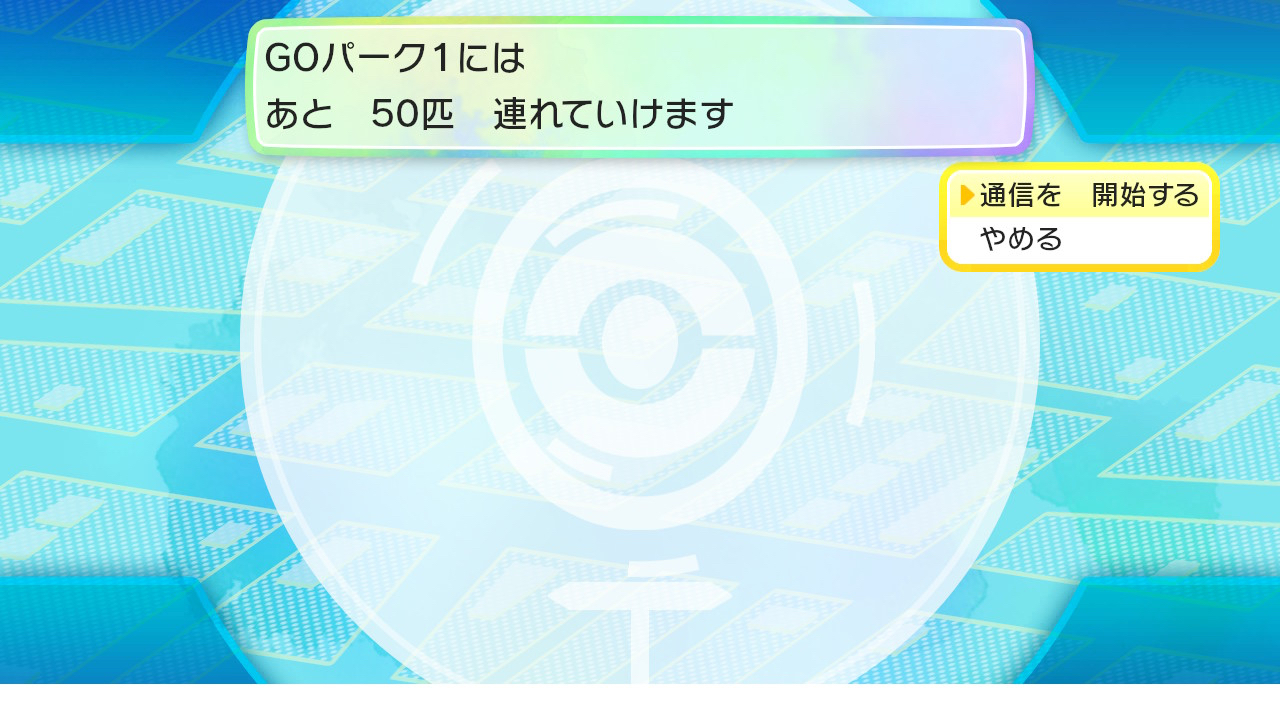
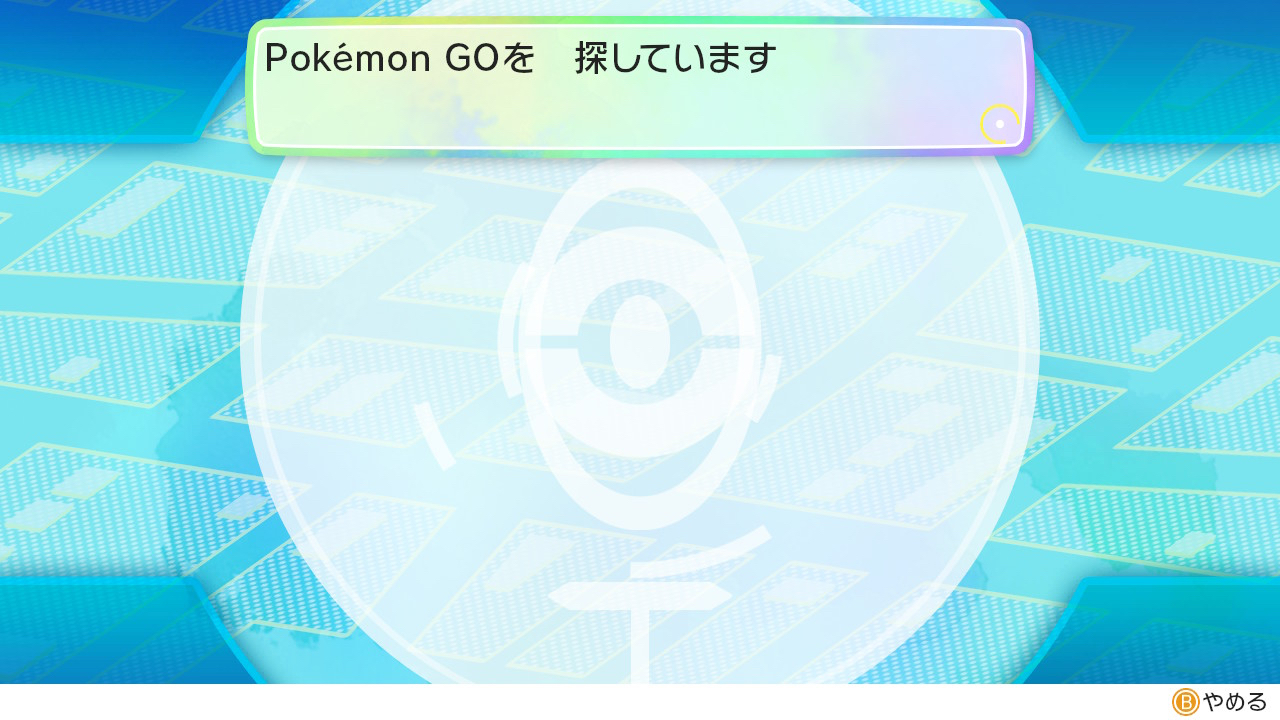
エリアを選んで「つうしんをかいしする」を選ぶ。
※画像は『ポケットモンスター Let’s GO! ピカチュウ・Let’s GO! イーブイ』のものです。
※画像は『ポケットモンスター Let’s GO! ピカチュウ・Let’s GO! イーブイ』のものです。
※画像は『ポケットモンスター Let’s GO! ピカチュウ・Let’s GO! イーブイ』のものです。
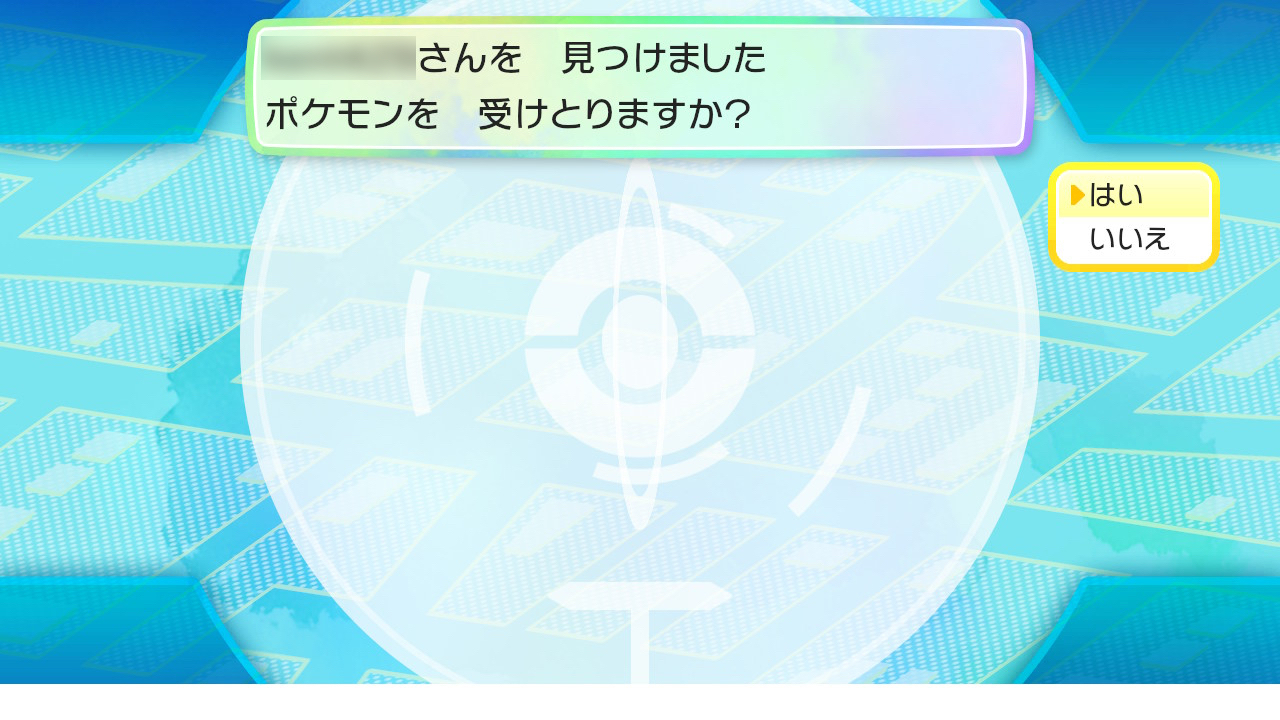
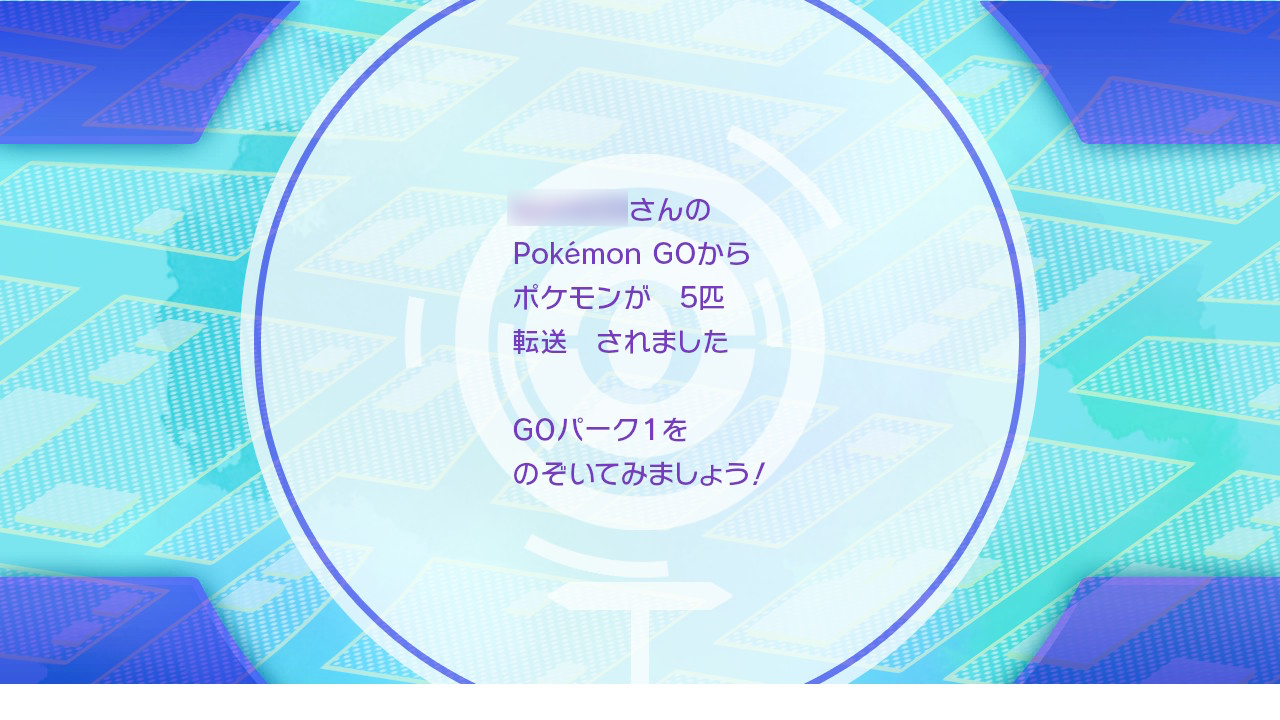
「ポケモンをうけとりますか?」で、「はい」を選ぶとポケモンが転送されます。
※画像は『ポケットモンスター Let’s GO! ピカチュウ・Let’s GO! イーブイ』のものです。

※画像は『ポケットモンスター Let’s GO! ピカチュウ・Let’s GO! イーブイ』のものです。
※画像は『ポケットモンスター Let’s GO! ピカチュウ・Let’s GO! イーブイ』のものです。
※画像は『ポケットモンスター Let’s GO! ピカチュウ・Let’s GO! イーブイ』のものです。
| ・販売元: Niantic, Inc. ・掲載時のDL価格: 無料 ・カテゴリ: ゲーム ・容量: 264.0 MB ・バージョン: 1.93.1 ※容量は最大時のもの。機種などの条件により小さくなる場合があります。 |
© 2016-2018 Niantic, Inc. © 2016-2018 Pokémon. © 1995-2018 Nintendo/Creatures Inc./GAME FREAK inc.