Gmail の連絡先と iPhone の連絡先アプリを同期する手段に、新しい方法が追加されました。CardDAV を使う方法です。今回はこれを使った、同期の設定方法をご紹介します。
CardDAV とは連絡先データを同期するための規格で、Google がこの規格に対応しました。iPhone・iPad もこの規格に対応しています。
これを使えば連絡先同期のためだけに Exchange で Google アカウントを登録する必要はなくなります。また、連絡先だけを同期したい時にも重宝します。
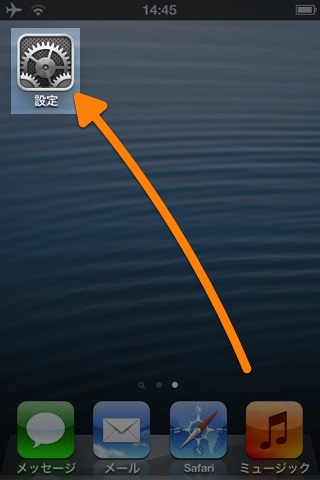
左:設定アプリを開きます。
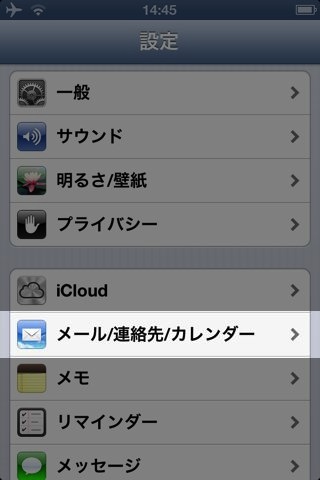
右:【メール/連絡先/カレンダー】をタップします。
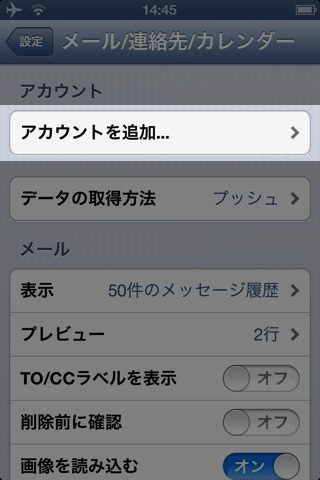
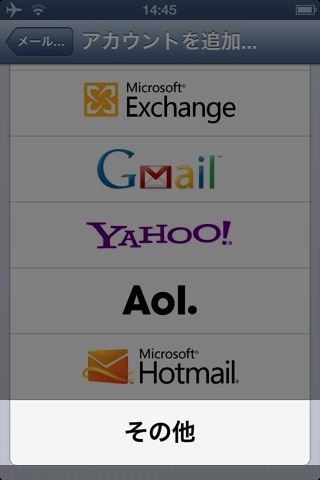
左:【アカウントを追加…】をタップ。
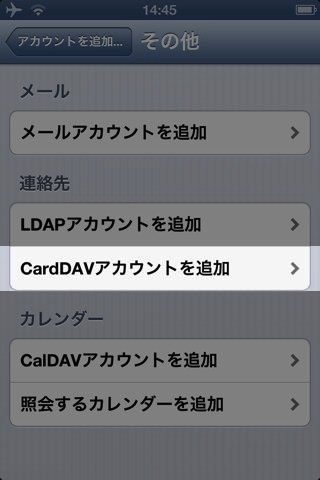
右:【その他】をタップします。
次に【CardDAVアカウントを追加】をタップします。
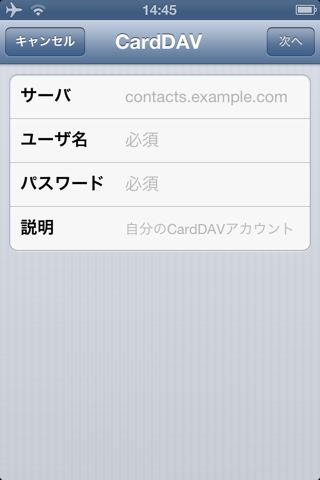
【サーバ】には「google.com」と入力します。
【ユーザ名】と【パスワード】には 普段お使いの Google アカウントのユーザー名とパスワードを入力します。2段階認証プロセスをお使いの場合は、別途パスワードを発行して入力します。
【説明】はラベルです。【サーバ】を入力すると自動で「Google」となります。
最後に右上の【次へ】をタップします。
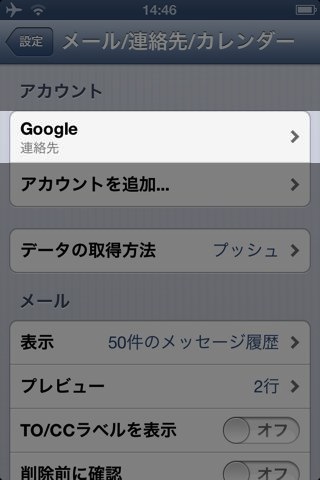
【アカウント】に「Google」が追加されていれば、設定は完了です。
あとは連絡先アプリを開き、連絡先データがきちんと同期されているかを確認しましょう。
目次